Post by Paddy by Grace on Dec 26, 2010 8:12:50 GMT -7
4 Simple Steps to Grow a Hundred Pounds of Potatoes in a Barrel
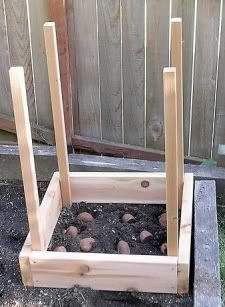
Container gardening isn't only for savvy urban gardeners and folks with limited space to grow, it can also be for folks who want to maximize their yields in a controlled environment. Not only does growing potatoes in a barrel reduce the amount of weeding and exposure to pests and fungi, you don't even have to risk shovel-damage to the tender potatoes by digging them out of the ground when they're done, just tip the container over!
After extensive research to plan my own potatoes-in-a-barrel, I've boiled all of the recommendations down to 4 simple steps to a winning potato harvest.
1. Select and prepare a container
You'll need to pick out a container such as a 50-gallon trash barrel or one of those half whiskey barrel planters. Alternatively, you can buy used food-grade barrels or commercially-available potato planters. Just about any 2 to 3-foot tall container will work, but be sure to select a container that either already has holes in it, or is okay to cut holes in. Next you'll want to clean your container with a mild bleach solution to get out any of the nasties that have been lingering in there.
Good drainage is critical for the cultivation of healthy potatoes so you'll want to cut or drill a series of large drainage holes in the bottom and bottom sides of your container. Alternatively, you can cut out the bottom altogether and place it on a well-drained surface like your garden bed.
2. Choose a variety and plant potatoes
Seed potatoes can usually be found at nurseries early in the growing season, but you should only have to buy them once. If you can, “chit” or sprout your potatoes before planting them by setting them out in an egg carton, the side with the most buds facing up, and putting them in a cool light room out of direct sunlight to sprout. Putting the tubers in an open paper bag can have this same effect.
Fill in the bottom of your container with about 6 inches of loose planting mix and compost. You'll want to use a planting mix with a peat moss-like soil amendment like this product made from repurposed coconut husks, doing so will keep the soil from becoming too compacted and help it to store moisture for the roots. Next, add some seed potatoes on the layer of soil, making certain to leave plenty of space between each cube. You can use the whole potato but I like to cut the potatoes into 1 to 2-inch cubes for planting. Loosely backfill the potatoes with another 6 inches of your soil and compost mix and water to dampen soil. Keep the soil damp at all times but be careful not to overwater.
3. Add more soil
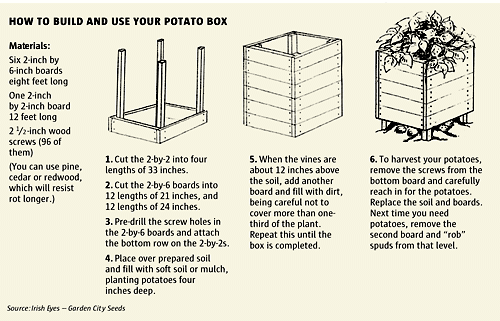
When they have about 6 to 8 inches of foliage, add another layer of your soil-compost mix covering about one-half to three-quarters of the visible stems and foliage. Repeat this process of allowing the sprouts to grow and then covering the sprouts and moistening the soil as the plants grow up toward the top of the barrel.
4. Harvest the potatoes
After about 10 weeks or until the plants flower and start to yellow, the potatoes should be ready to harvest. Carefully dig down with your hands to inspect the top-most layer. After you've confirmed your suspicions, dump the barrel out on a tarp and inspect your bounty.
Share
4 people like this.
Connie Whitted I'm gonna check this out... May be a easier way of growing potato's then in the ground. And if it works for potatoes, it may also work for Tomatoes. : )
15 hours ago
Borys Polon if you pot Tomatoes, you can hang the pot and grow the Tomatoes upside-down.
15 hours ago · 2 people
Connie Whitted LOL, I tried the topsie turvie thingy, and it did not work well for me. I killed several kinds of plants...
15 hours ago · 2 people
Susan Lanphear opps Connie, sounds like something I would do...
15 hours ago
Susan Lanphear Borys-how do you do that?
15 hours ago
Connie Whitted This year I'm going to be planting in containers instead of the ground.Ithink I could do better that way. The weather gets so hot, it kills the plants so fast here in Central Tx. and its a big waste of time and money, so I'm trying something different this year. : )
15 hours ago · 2 people
Susan Lanphear I also thought of trying containers this year as I do not have a rototiller...Has anyone tried growing in containers in the house in winter months, could be interesting...
15 hours ago · 1 person
Borys Polon I used a plastic 5 gal. pail.
Cut a 1 1/4 in hole in the bottom.
Wrapped a large wad of cotton around the stem of the tomatoe plant.
Cotton wrap is a holder for the plant.
Stick the plant top through the hole until the plant is suspended upside...See More
14 hours ago
Tova Yisraela You CAN grow many things on top of the ground. I had tubs and pots for smaller plants (and potaotes) and for the bigger plants I built big planter boxes out of old scrap lumber and also rocks. Fill with compost and soil and all the other ...See More
9 hours ago · 1 person


